In order to ensure your vehicle is running in its optimum condition, you want to be sure that you are following all of the recommended steps according to the manufacturer of your vehicle. Fortunately, they made it extremely easy for you to do this by including a car owner’s manual. Inside the manual, you will find all of the recommended and required maintenance items that you will need to perform or have performed by a qualified mechanic.
Vehicle Motor Oil
The engine of any vehicle that has an internal combustion engine has hundreds of moving parts and require lubrication to prevent serious damage. The oil is considered to be the lifeblood of your vehicle’s engine and it needs to be maintained year round. The manufacturer of your vehicle recommends that at regular intervals you change your engine’s oil (usually, every 3000 miles) to ensure that it is able to function properly. The actual interval will vary from make and model, so be sure that you consult your owner’s manual.
Changing Your Own Oil
While many people these days don’t have enough time it takes to change their own oil so they pull into one of the many shops that offer the service for a nominal charge. So, if you are looking to save yourself some money and have a good hour or so to kill, you can do the oil change yourself. Just follow some very simple steps and you will be fine.
Preparations
It is really important that you get everything together before you get started since you will not be able to drive your vehicle until you are finished. The first thing you should always do is consult your owner’s manual to find the type of motor oil that it recommends that you use. You can also find that stamped on the engine’s oil filler cap/dipstick. It is very important that use only the recommended type of oil in your vehicle.
Supplies and tools
Having the right tools for the job is equally important to perform an oil change. You should have the following:
5 quarts of the manufacturers recommended oil
1 new oil filter (also manufacturer’s recommended for your car)
Funnel
Adjustable wrench
Oil catch pan (many different kinds on the market)
Oil filter removal tool
Two tire chocks (to block the rear wheels)
2 jack stands (properly rated for your vehicle) in case you need to lift the front end of your car
Note: absolutely never crawl underneath a vehicle that is lifted off the ground without placing jack stands underneath the axle.
Once you are ready to get started, just follow these steps to accomplish an oil change.
Step 1 Locate the oil pan plug (located at the lowest point of oil pan)
Step 2 Position the oil catch pan so that it is directly underneath plug
Step 3 Using the adjustable wrench first loosen and reposition the catch pan if necessary
Step 4 Completely remove the plug and let the oil drain out (caution: engine oil will be warm or hot)
Step 5 Locate the oil filter (it should be in reach just to the front of the engine
Step 6 Using the filter removing tool, loosen and remove the old oil filter (there will be residual oil in the filter)
Step 7 After the oil stops coming out, you can put the plug back in (be sure not to cross thread the plug
Step 8 Install the new oil filter (remember to apply a thin film of new oil on the gasket of the new filter)
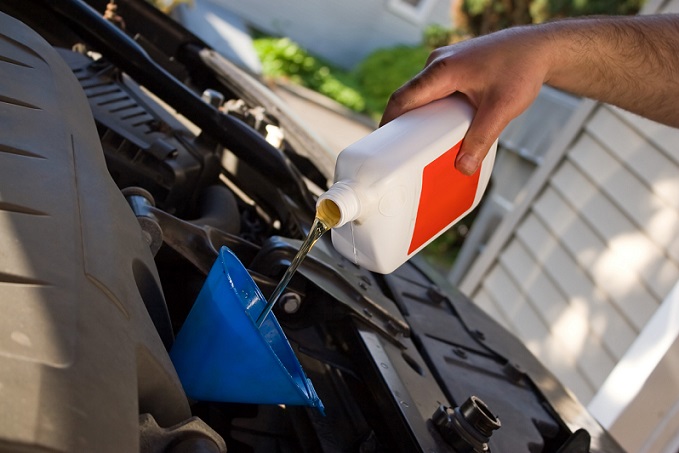
Step 9 Locate the oil filler cap and remove the cap and place a funnel inside
Step 10 Begin adding the oil back into the engine, one quart at a time
Step 11 You should stop and check the level using the dipstick after you add the fourth quart to see if you are close to being full. Chances are great that you will need to add the fifth one
Step 12 replace the oil filler cap and check the oil level one last time
Step 13 pour the old oil into a plastic container and take it to a place that advertises accepting of oil engine oil.
Step 14 Remove the jack stands and lower the car back down and remove the chocks from the rear wheels.
You are now finished and you should be extremely proud of yourself for being able to change your own oil!!


